From Protoi Healing
| Line 25: | Line 25: | ||
{| class="wikitable" | {| class="wikitable" | ||
!class="light-yellow-background"|Range (group 1 cards): | !class="light-yellow-background"|Range (group 1 cards): | ||
| − | | | + | |530 km |
|- | |- | ||
!class="light-yellow-background"|Range (group 2 cards): | !class="light-yellow-background"|Range (group 2 cards): | ||
| − | | | + | |23 km |
|- | |- | ||
!class="light-yellow-background"|Range (group 3 cards): | !class="light-yellow-background"|Range (group 3 cards): | ||
| − | | | + | |33 km |
|} | |} | ||
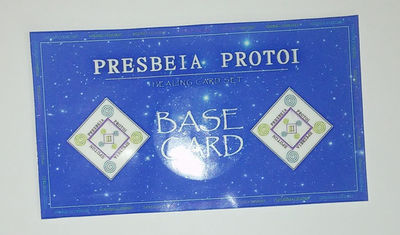
|[[image:base card01.jpg|border|400px]] | |[[image:base card01.jpg|border|400px]] | ||
| Line 39: | Line 39: | ||
{| class="wikitable" | {| class="wikitable" | ||
!class="light-yellow-background"|Range (group 1 cards): | !class="light-yellow-background"|Range (group 1 cards): | ||
| − | | | + | |1.300 km |
|- | |- | ||
!class="light-yellow-background"|Range (group 2 cards): | !class="light-yellow-background"|Range (group 2 cards): | ||
| − | | | + | |140 km |
|- | |- | ||
!class="light-yellow-background"|Range (group 3 cards): | !class="light-yellow-background"|Range (group 3 cards): | ||
| − | | | + | |430 km |
|} | |} | ||
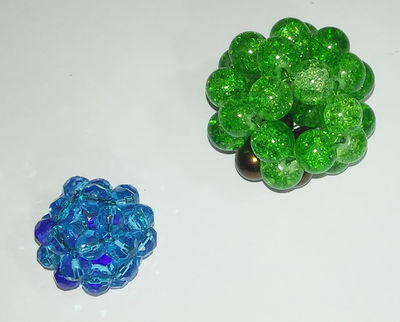
|[[image:pentagon01.jpg|border|400px]] | |[[image:pentagon01.jpg|border|400px]] | ||
| Line 53: | Line 53: | ||
{| class="wikitable" | {| class="wikitable" | ||
!class="light-yellow-background"|Range (group 1 cards): | !class="light-yellow-background"|Range (group 1 cards): | ||
| − | | | + | |1.800 km |
|- | |- | ||
!class="light-yellow-background"|Range (group 2 cards): | !class="light-yellow-background"|Range (group 2 cards): | ||
| − | | | + | |180 km |
|- | |- | ||
!class="light-yellow-background"|Range (group 3 cards): | !class="light-yellow-background"|Range (group 3 cards): | ||
| − | | | + | |630 km |
|} | |} | ||
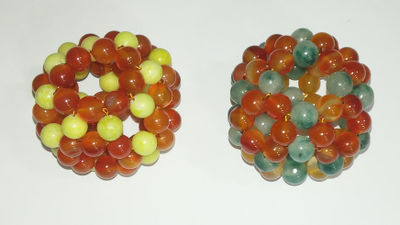
|[[image:octagon01.jpg|border|400px]] | |[[image:octagon01.jpg|border|400px]] | ||
| Line 67: | Line 67: | ||
{| class="wikitable" | {| class="wikitable" | ||
!class="light-yellow-background"|Range (group 1 cards): | !class="light-yellow-background"|Range (group 1 cards): | ||
| − | | | + | |4.300 km |
|- | |- | ||
!class="light-yellow-background"|Range (group 2 cards): | !class="light-yellow-background"|Range (group 2 cards): | ||
| − | | | + | |2.300 km |
|- | |- | ||
!class="light-yellow-background"|Range (group 3 cards): | !class="light-yellow-background"|Range (group 3 cards): | ||
| − | | | + | |3.300 km |
|} | |} | ||
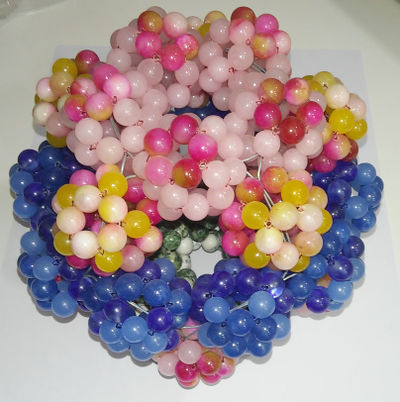
|[[image:super pearlgonit01.jpg|border|400px]] | |[[image:super pearlgonit01.jpg|border|400px]] | ||
Revision as of 14:39, 4 July 2016
The Healing Tools
On this page you will find the different healing tools available for use with the Healing Cards:
Base Cards and Pearlgonites.
Each healing tool contains invisible, etheric healing crystals.
All Healing Card Sets contain one Base Card. The only practical difference between the healing tools is the range of operation. This depends on the number and structure of the healing crystals within the healing tool, and also on the groups of Command Cards used with the tool.
All Pearlgonites have a far greater range of operation than the Base Cards, due to their geometric structure and the greatly increased number of etheric crystals inside. Of the Pearlgonites, Pentagon Pearlgonites have the smallest range, followed by Octagon Pearlgonites which have an increased range, and finally Super Pearlgonites which have an enormous range.
Healings will run as long as the target is within range of the healing tool. Each healing tool has 3 ranges for each group of Command Cards used with it. Group 2 cards have the smallest range, followed by group 3 which have a modest range, finally group 1 cards have the largest range. If a healing uses more than one group of Command Cards, the effective range of that healing will be equal to that of the group with the smallest range.
It is possible for 'partial healings' to occur, if the target is out of range of one group of required cards, but still within range of another group. For example if a particular healing requires Command Cards from all 3 groups, and the target leaves the smallest range of the healing tool (group 2 cards), the healing of group 2 cards will stop until they return within this range. However, the healings of group 1 and 3 cards will continue unless they also move out of their range.
It may be useful to give the healing target a Base Card to carry with them after starting a healing process, to ensure that they are always in full range of the healing.
See also
| Interwiki |
|---|
|
Deutsch • English • Español • Français • Italiano • Nederlands • Svenska • 中文 (edit language page) |
| Disclaimer |
| All content posted on this site is commentary or opinion and is protected under Free Speech. It is your right to educate yourself in health and medical knowledge, and to seek helpful information and counsel for your own benefit, and for that of your family. You are the one ultimately responsible for your health. This website offers instructions in energy healing techniques. Neither this website nor its owner is an accredited, licensed or certified school and the owner of this website is not a physician or licensed health care provider. The information, the views, services and products available through this site is not intended or implied to be a substitute for professional medical advice, diagnosis or treatment but as an alternative for those who are seeking solutions for better health. We do not claim to “cure” disease, but simply help you make physical and mental changes in your own body in order to help your body heal itself.
|


